
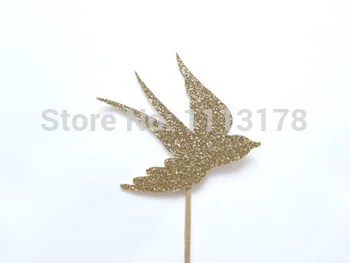
Блестящее внешнее пространство инопланетяне День рождения кекс топперы Свадьба
1 256,58 руб.

Сохраните в закладки:


*История изменения цены! Указанная стоимость возможно, уже изменилось. Проверить текущую цену - >
| Месяц | Минимальная цена | Макс. стоимость | Цена |
|---|---|---|---|
| Mar-22-2026 | 0.25 руб. | 0.79 руб. | 0 руб. |
| Feb-22-2026 | 0.0 руб. | 0.47 руб. | 0 руб. |
| Jan-22-2026 | 0.56 руб. | 0.66 руб. | 0 руб. |
| Dec-22-2025 | 0.56 руб. | 0.86 руб. | 0 руб. |
| Nov-22-2025 | 0.98 руб. | 0.55 руб. | 0 руб. |
| Oct-22-2025 | 0.35 руб. | 0.98 руб. | 0 руб. |
| Sep-22-2025 | 0.53 руб. | 0.30 руб. | 0 руб. |
| Aug-22-2025 | 0.80 руб. | 0.51 руб. | 0 руб. |
| Jul-22-2025 | 0.58 руб. | 0.13 руб. | 0 руб. |
Новые товары
Характеристики
Описание товара
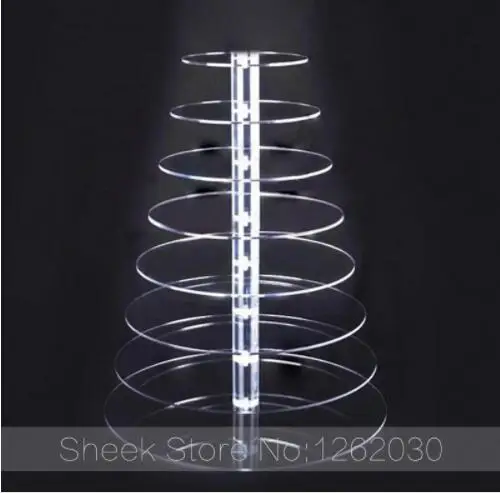
Free Shiping 8 Tier Crystal Acrylic Round Cupcake Stand or perspex cake Display Tools Suitable for Christmas/Wedding/Birthday


7Tier Acrylic Cupcake Display
There is no need for glue or other fixings.
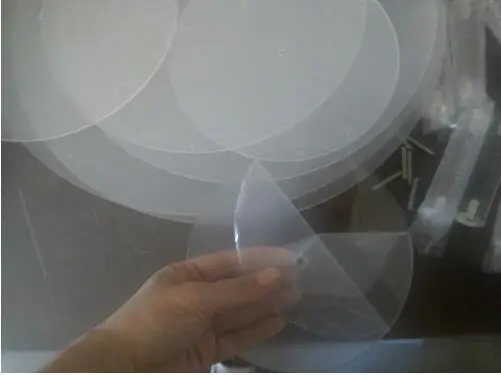
The edges of the acrylic are perfectly clear and polished. Every part of the stand has been accurately cut and finished.
Can be taken apart, washed and stored away for another time.
The stand comes flat packed and only takes a few minutes to assemble.
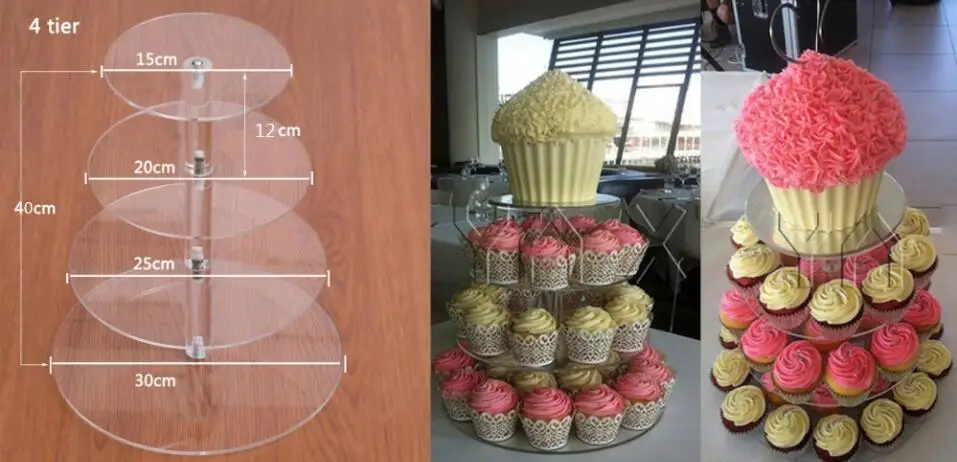
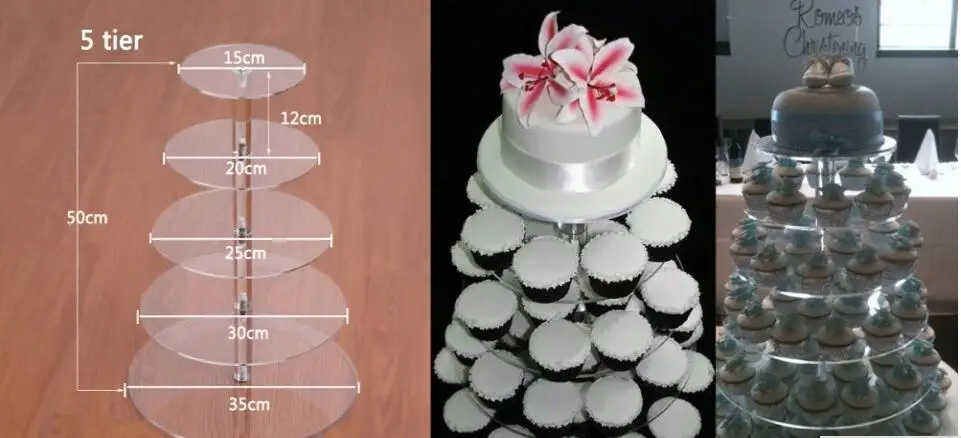
The entire size: Length 450 * Width 450 * Height 631mm
Rod Size : Diameter 30mm(1.18") x Height 100mm(4")
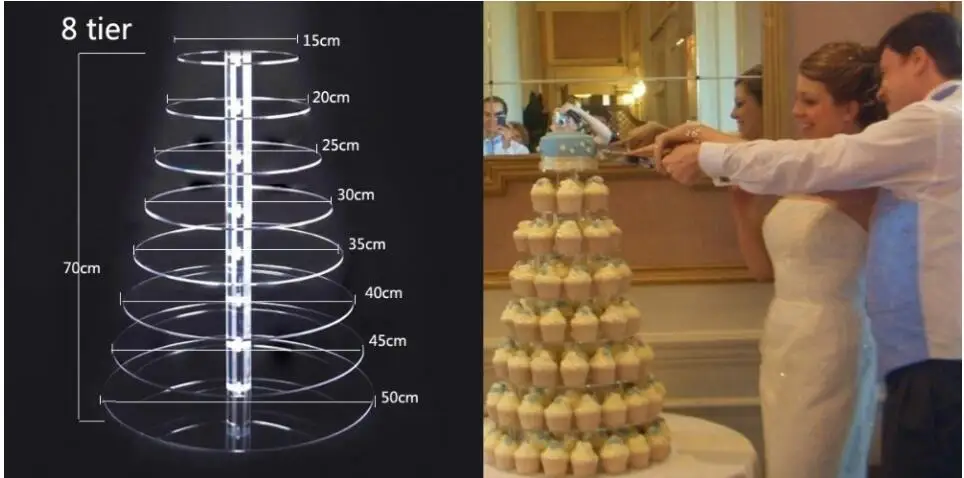
Plate Size: tier 1:150x150mm / 6"
tier 2:200x200mm / 8"x8"
tier 3:250x250mm / 10"x10"
tier 4:300x300mm / 12"x12"
tier 5:350x350mm / 14"x14"
tier 6:400x400mm / 16"x16"
tier 7:450x450mm / 18"x18"
Contents: Tier plates x7 ; Rod pillars x 6; Screws x 7 Ideal for weddings, parties, kids birthday parties, christenings, etc.
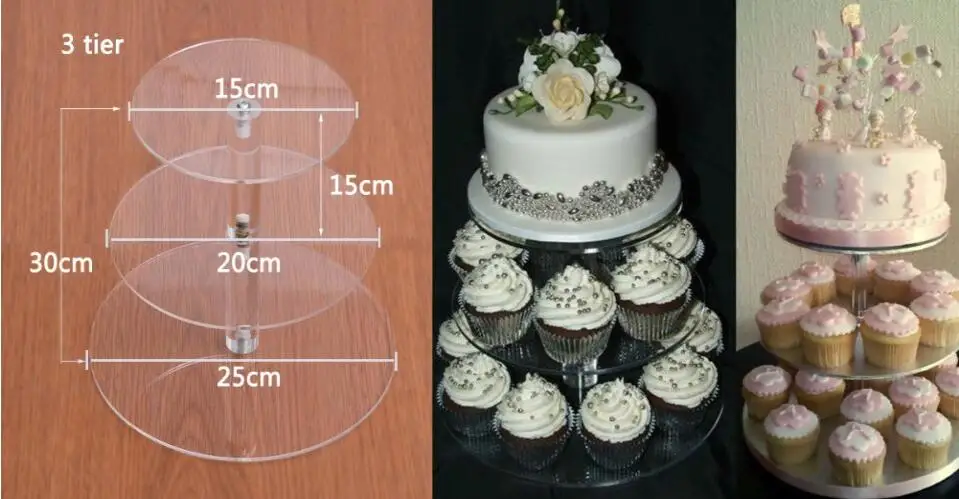
Below you will find an example of how many cupcakes can be arranged on each tier.

CARE GUIDE:
* The stand is made from acrylic which will scratch if it is not looked after properly.
* To clean the product use warm water with a little washing-up liquid and soft cloth.
* Do not use any abrasive cleaning products as they will make the acrylic.
* Do not put the stand in a dishwater
ASSEMBLY GUIDE:
Parts: Acrylic discs, head screws, double screws, acrylic rods and acrylic feet.
* Remove the manufacturer\'s protective cover from BOTH side of each acrylic component.
* Begin by placing the feet to the underside of the bottom disc ensuring they are evenly spaced.
* Take a metal head screw and place it on to a flat surface where the stand is to be constructed
* Carefully line up the hole(s) of the largest disk with head screw ensuring the disc is resting securely on the acrylic feet.
* Now screw the first rod onto the screw thread of the head screw making sure the acrylic disc is clamped firmly between two components.
* Continue by placing the next largest disc on to the screw thread of rod and tighten each piece as you go.
* The final rod is to be used as the supposed for the top tier and the stand is completed by adding the other screw cap into the top.

Step One:

Step Two:

Step Three:

PACKING DETAILS:
Package: Elastic film+ air bag + outer ctn


Any further details,please feel free to contact us,your inquiry will be replied in 24 hours.
Any further details,please feel free to contact us,your inquiry will be replied in 24 hours.
CARE GUIDE:
* The stand is made from acrylic which will scratch if it is not looked after properly.
* To clean the product use warm water with a little washing-up liquid and soft cloth.
* Do not use any abrasive cleaning products as they will make the acrylic.
* Do not put the stand in a dishwater
CARE GUIDE:
* The stand is made from acrylic which will scratch if it is not looked after properly.
* To clean the product use warm water with a little washing-up liquid and soft cloth.
* Do not use any abrasive cleaning products as they will make the acrylic.
* Do not put the stand in a dishwater
ASSEMBLY GUIDE:
Parts: Acrylic discs, head screws, double screws, acrylic rods and acrylic feet.
* Remove the manufacturers protective cover from BOTH side of each acrylic component.
* Begin by placing the feet to the underside of the bottom disc ensuring they are evenly spaced.
* Take a metal head screw and place it on to a flat surface where the stand is to be constructed
* Carefully line up the hole(s) of the largest disk with head screw ensuring the disc is resting securely on the acrylic feet.
* Now screw the first rod onto the screw thread of the head screw making sure the acrylic disc is clamped firmly between two components.
* Continue by placing the next largest disc on to the screw thread of rod and tighten each piece as you go.
* The final rod is to be used as the supposed for the top tier and the stand is completed by adding the other screw cap into the top.
PACKING DETAILS:
Thickness: 4mm
Material: Acrylic (PMMA)


Заказывала данные наушники для себя,очень довольна этим товаром. Пользуюсь уже больше месяца и нареканий к ним за это время... Читать отзыв полностью...

Замечательные толстовки, милые кошечки! Цены приемлемые, можно выбрать самому себе рисунок из предложенных. Да и можно самому заказать рисунок с... Читать отзыв полностью...

У меня дома два сладкоежки)) Решили заказать Аппарат для приготовления сладкой ваты, и делать самим дома. Товар пришел вовремя, хорошо... Читать отзыв полностью...

Тщательно продуманный дизайн и отличное качество звука этих мини-наушников ставит их в один ряд с более крупными моделями...Впечатля юще мощное... Читать отзыв полностью...

Очень красивое, элегантное украшение! можно подарить в качестве подарка,а так же как и помолвочное!себе заказывала в качестве подарка, очень понравилось!... Читать отзыв полностью...

Последние несколько лет часто пользуюсь услугами этой компании, частенько делаю заказы, для дома, для детей и для себя любимой, и... Читать отзыв полностью...


Заказала эту футболку, под свои джинсы. Товар пришел а отличном состоянии. Футболка идеально подошла по размеру. После стирки не села,... Читать отзыв полностью...